Headless SSD install on Raspberry Pi 4B

I have a Raspberry Pi 4B that I use as a mini home server and pi-hole. I love that I can block intrusive ads, have a secure vpn connection to my home network, and have backup for my music collection. The Raspberry Pi 4 is a fun little device and if you can get your hands on one, it has a lot of cool uses. (Note, if you're having trouble, may I recommend RPILocator.. follow them on Mastadon for real time updates.)
One of my concerns was the reliance on using a micro SD card for my entire storage and Operating System. I decided to transition over to a SATA SSD and I'd like to show you some of the troubles I ran into and how I overcame them.
The Right Hardware
I decided on the Western Digital 1 TB SATA SSD. It supports B+M key SSDs which is important to note.
After a false start with a Geekworm adapter, I went with this Argon case. This take a little assembly but it will support the SSD I purchased above.
Install software
As always, update your Pi to the latest version first.
1$ sudo apt update
2$ sudo apt upgrade
I struggled to get Pi Clone working so you may need to run
1$ sudo rpi-upgrade
There's a good chance you can skip this step but if you have trouble later on, such as with setting USB boot, come back to this step.
Next, I installed piclone which is what I used to copy the Micro SD to the SATA SSD.
1$ sudo apt install piclone gvfs
Note, you will absolutely need gvfs otherwise piclone will note work.
If you haven't already, enable being able X11 ssh by editing your /etc/ssh/sshd_config file and setting
X11Forwarding yes
Next you can ssh into your pi using ssh -X. Change the credentials below for your user:
1$ ssh -X pi@raspberrypi
Once you're in, you will need to launch the piclone copier.
The first pitfall is how you're going to run a GUI sudo command from X. Check out this handy blog which will guide you through using X11-Forwarding via SSH as a root or sudo user.
Once you can run a GUI app as root via ssh, the next pitfall is how you must launch piclone - which is using sudo and via dbus. I'd tried just using sudo piclone which will not work.
1$ sudo dbus-launch piclone
From there you'll have the piclone GUI pop up and, if all has gone well you'll be able to copy the microsd card to your SSD. Depending on the size of the microsd, this may take a while. If you don't see the copy to/from options, again double check you have gvfs installed.
If you run into more trouble, you may be able to find a solution on the GitHub issue.
Boot Order
Now you've got an SSD installed using the Argon case, copied the Micro SD card to your SSD, and you've hopefully confirmed that copy was successful by checking the contents of the SSD from the linux command line. The last thing to do is to set the boot ROM and boot order. Start by running the raspi-config utility:
1$ sudo raspi-config
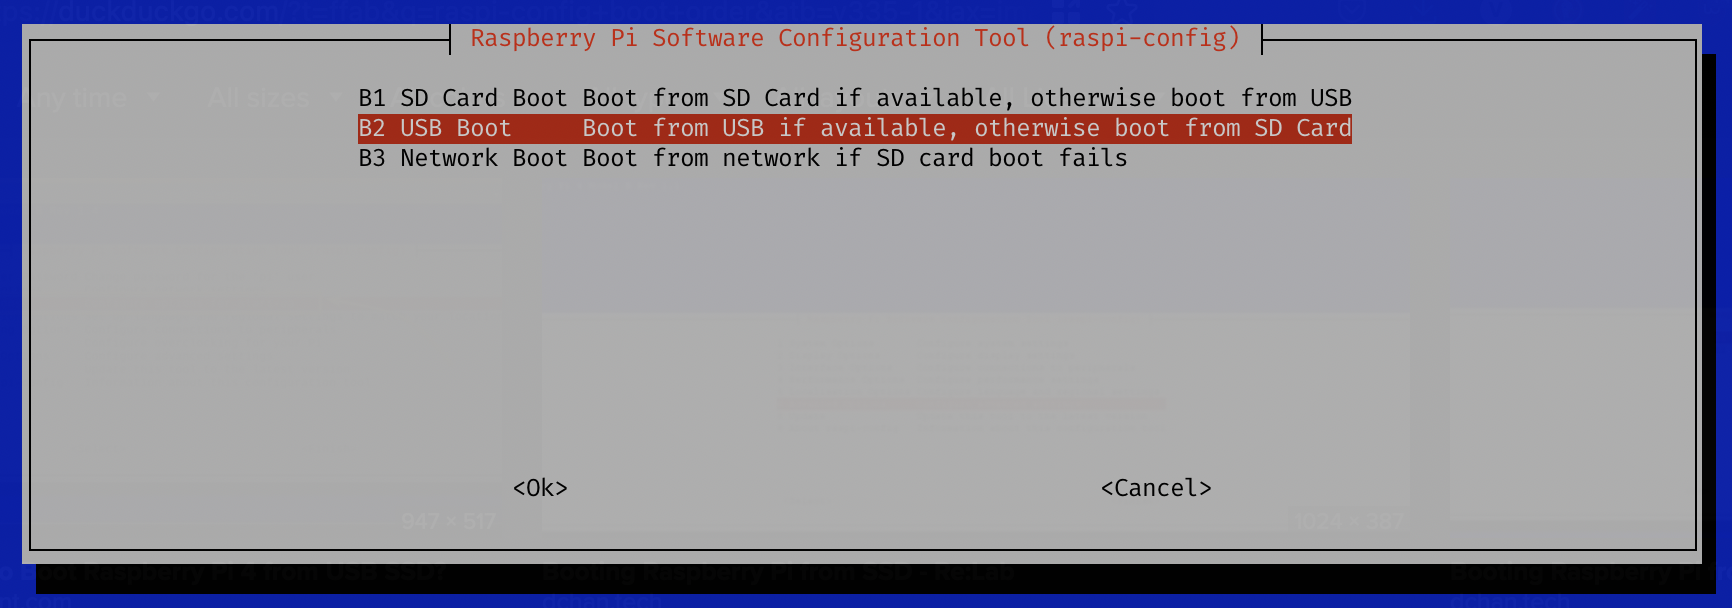
Scroll down to the Advanced Options, Select A6 Boot Order and then finally B2 to Boot from USB if available, otherwise boot from SD Card. Lastly you can exit.
If you needed to upload the ROM, you'll also need to go to the Advanced Options and choose option A7 to update the Bootloader version to use the most recent one you got from rpi-upgrade if you ran it.
A restart from here should see your Raspberry Pi booting from your newly installed SSD. From here, consider using the Micro SD card as a backup. (Topic to be covered in the future.)
1$ sudo reboot
It is a bit outdated but a step by step can be found on YouTube albeit this version requires a monitor to be hooked up to your Pi.
As a last step, I'd strongly recommend undoing any work you did to open up ssh including the X11 Forwarding unless you actually need it.
Sources:
[1] https://www.simplified.guide/ssh/x11-forwarding-as-root
[2] https://www.q4os.org/forum/viewtopic.php?id=2675
[3] https://github.com/raspberrypi-ui/piclone/issues/14
[4] https://www.youtube.com/watch?v=a8nzkLryGmM